

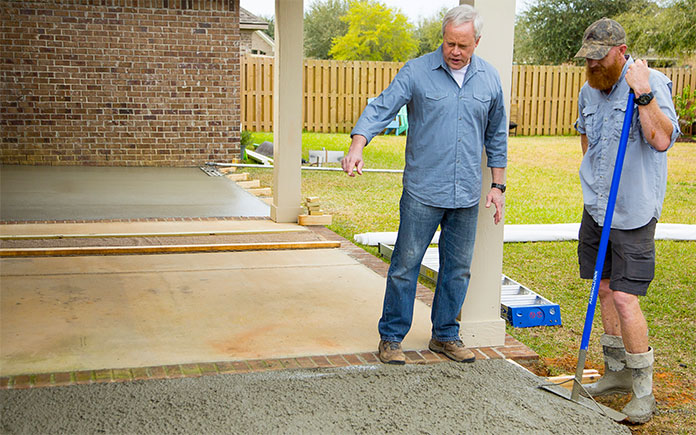
So, you’ve decided to pour a concrete pathway, patio or slab — that’s the first step toward improving your home. But do you have the right tools to work with concrete?
I don’t mean the materials to make a form and fill it. For instance, you’d need lumber, gravel base, a level, concrete mix and a tamp, along with other stuff to make a slab. But rather, the basic gear and tools to complete just about any concrete job.
Before you start a concrete project, check this list. Chances are, you’ll need these tools.
Protective Gear
Remember, safety first! Exposure to concrete mix can irritate your skin, so always wear rubber boots, pants, a long-sleeve shirt and rubber gloves.
You’ll also need splash-proof, chemical-safe glasses to protect your eyes, and an N95 respirator to prevent inhaling concrete dust.
Finally, it’s a good idea to wear earplugs if you’re using a portable mixer. They can be noisy!

Wheelbarrow
If you need to haul bags of cement or concrete mix around your yard, load them up in a wheelbarrow. Your back will thank you! Wheelbarrows are also perfect for mixing small amounts of concrete mix and water.
Just empty the concrete mix into a wheelbarrow and form a depression at the center of the mix. Then pour two-thirds of the recommended water amount into the depression. (An 80-pound bag of Quikrete concrete mix requires about 3 quarts of water.)
Finally, work the mix with a hoe and gradually add water until it has a uniform consistency and looks like thick oatmeal.


Portable Concrete Mixer
When it comes to mixing concrete, a wheelbarrow and hoe get the job done. But if you want to really speed up the process and save your energy, get a portable concrete mixer.
Ready-to-assemble mixers come with a stand, mixer barrel, mixing tines, wheels and hardware. A decent concrete mixer with a 5-cubic-foot barrel could cost $300 to buy, or you could rent one for a few hours for about $35.
Either way, this machine takes the guesswork — and elbow grease — out of mixing concrete. So you can focus on pouring a patio in record time!

Bucket, Drill and Mixing Paddle
Looking for a low-budget portable concrete mixer? Look no farther than a 5-gallon plastic bucket, a drill and a mixing paddle.
Just attach the mixing paddle to the drill, pour the concrete mix and water into the plastic bucket and start drilling! Or, really, mixing.
If you’ve got a drill and a bucket on hand, you can buy a mixing paddle — compatible with a corded or cordless drill — for just $15. It’s the perfect DIY setup for small concrete projects!
Screed
A screed is a long straight edge that you run back and forth over concrete to level it. Reinforced aluminum screeds, ranging from $30 to $100, are available at the home center in different sizes for most needs.
Or you can do what I do — save money and make your own!
You’ll need two pieces of wood: one strip should be long enough to extend over the form’s edges while a 1-by-4 nailed underneath it should be short enough to fit inside the form.
Just run the screed along the formwork edges to smooth the concrete surface, and remove any excess concrete mix.
Shovel
No matter how many concrete projects you’ve worked on, there’s no such thing as a clean pour. You’ll always have voids to fill, and a shovel comes in handy to move small amounts of concrete.
In addition, remember that excess concrete mix from screeding the surface? You’ll need a shovel to remove and relocate it to needed areas.
Pro tip: A square shovel, as opposed to a rounded gardening shovel, is the best tool for this job. But in a pinch, any shovel will do.


Float
Screeding poured concrete levels the surface, but you still have to deal with imperfections. That’s why you’ll need a float to help finish the job.
Just after the surface has lost its sheen, and the concrete starts to harden but is still workable, run the float over it with an arching motion.
Running a float over screeded concrete compacts the concrete — so it’s denser and stronger — and smooths the surface. It may cost $12 at the home center but the impact is priceless.
Edger
A concrete slab with rounded edges has a finished look that’s attractive and functional.
Use a concrete edger (just $10 at the home center) to prevent chipping and spalling.
Wait until the concrete is firm and has lost its sheen, but is still workable, and then start edging.
This step isn’t necessary for a concrete subfloor that won’t be seen or directly walked on, but it’s a must for garbage can pads, patios, and sidewalks.

Stiff-Bristle Broom
Whether you’re pouring a new concrete slab or resurfacing an old one, you need to texture the surface with a stiff-bristle broom. This gives the concrete a non-slip surface that’s uniform in appearance.
Applying the texture follows leveling the surface with a screed and smoothing it with a float. Wait until the concrete starts to turn solid, but while it’s still soft.
Stiff-bristle brooms range from $20 to $50 at the home center. Whichever option you choose, it’s a small price to pay for the peace of mind that comes from making the slab safer to walk on.
Groover or Saw
Concrete, like most building materials, expands and contracts as seasons change. It’s important to minimize the cracks in a slab to preserve its look and function.
One way to do that is to make straight-line control joints just after the concrete starts to harden and the surface has lost its sheen.
You can cut control joints using a groover and any straight board. Just hold the groover parallel to the board at predetermined locations and run it vertically down the slab.
Control joints should be cut to at least 1/4 the slab’s depth and at equal intervals. For instance, add grooves every 10 feet for a long driveaway and every 4 feet for a sidewalk.
Use a bronze or heavy-gauge stainless steel groover (approximately $25) to score freshly poured concrete. Or you can just saw cured concrete.


