This content was originally published on OldHouseOnline.com and has been republished here as part of a merger between our two businesses. All copy is presented here as it originally appeared there.
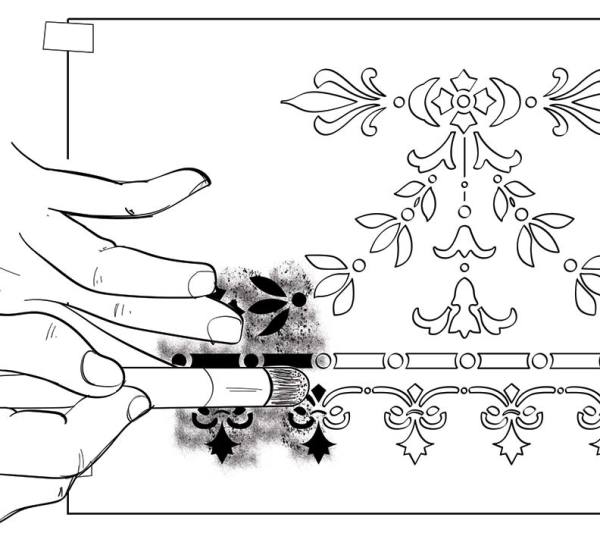
Step 1
To place a frieze, position the stencil at the top of the wall, using a level to ensure it’s straight. Secure it in place with painter’s tape. Mark the bottom of the stencil with tape across the room. If needed, cover the ceiling or any woodwork with the tape as well. Pour a small amount of paint onto a paper plate, then gently dip your brush and blot it on a paper towel-keep it almost dry to avoid bleeding paint beneath the stencil.

Step 2
Dab the brush at a 90-degree angle on the stencil openings. Repeat the process to ensure good coverage, building the paint up in thin layers. Once a section is done, carefully remove the stencil by pulling up and away from your work, and reposition it by using the tape marks in the next area.