
Hour 1
Hear how to keep rainwater from seeping under a garage door, get rid of a ring around a toilet bowl and more.
Blocking Rainwater from Seeping Under Garage Door

A homeowner is having a problem with rainwater seeping under his garage door.
“The bottom of the door seems to close tightly against the concrete floor, but I have noticed that there is always a wet spot inside the garage after it rains. I don’t want the problem to get any worse. Is there some way to block out the water?”
Here’s how I fixed this problem on my studio garage door — all you need is a vinyl threshold and construction adhesive. Just glue the threshold down, close the door on top of it, and adjust it to the right position. The rubber weatherproofing strip on the door bottom will work with the vinyl threshold to keep the water out.
Plus, you may notice that your garage has less temperature fluctuation because it’s sealed up a little more.
This little trick also acts as a dam, directing water away (unless you’re dealing with a tidal wave!). To keep water from sneaking around the ends, apply a bead of caulk at the end of the threshold seal.
Another option is to install weatherstripping along the sides and bottom of the garage door. This can create a tighter seal and prevent water from seeping in.
Read: How to Seal the Bottom of Your Garage Door
If you suspect your garage floor has dipped down, check it with a level or straight board. If it has, you can use a resurfacer to level it off.
Other than a settled concrete floor, factors like the slope of your driveway or surrounding landscaping may also cause water to seep into your garage. To prevent water from entering your garage and causing foundation problems, install or adjust your gutter system to divert rainwater away from it.
Getting Rid of a Ring Around the Toilet Bowl

A homeowner says the toilet in her master bathroom has a dark ring around the bowl, right at the water line.
“I have tried scrubbing it with every imaginable cleanser, but nothing has worked. The toilet is about 15 years old, but it works fine. I do not want to buy a new toilet if I do not have to. The other two toilets in the house do not have this problem. Is there any way to remove the ring?” she asks.
Although your porcelain throne appears to be smooth and shiny, if you were to examine it under a microscope, you’d see that it’s actually pitted. And this pitted surface can be the culprit behind those pesky mineral deposits that stubbornly cling to the waterline.
One common method to clean this is to use a pumice stone, which you can find at most hardware stores. Now, you’ll want to wet the stone and gently scrub the ring until it disappears. Be careful not to scrub too hard or use a dry stone, as this can scratch the porcelain surface of the toilet.
Another option is to use 400-grit wet/dry sandpaper. Wet the sandpaper and gently scrub the ring with circular motions, applying even pressure. Use gentle soap or cleaning solution for stubborn stains. Rinse the bowl thoroughly with water after scrubbing to remove debris.
Read: The Scrub-Free Way to Clean Your Toilet
Hour 2
Hear the difference between two countertop refinishing kits, a tip for fixing a delaminating cabinet, how to enlarge attic access with a fold-down door and more.
Countertop Refinishing: LuxROCK vs. SpreadStone

A homeowner wants to know: “During one of your shows, Chelsea used the Daich Coatings LuxROCK kit, which can cost over $200 at Home Depot. However, they also offer the Daich Coatings SpreadStone kit, which is priced around $100 less than the Lux Rock kit. The question is, would you recommend the SpreadStone kit, or is it necessary to invest in the more expensive Lux Rock kit?”
The LuxROCK Solid Surface Granite Countertop Kit provides a smooth polished finish with an authentic granite appearance highlighted by attractive sparkling mineral accents. The kit retails for $299 and is intended only for interior use.
Watch: How to Resurface Laminate Countertops (And More!)
In contrast, the SpreadStone Countertop Kit offers a speckled stone appearance with a lower sheen, natural stone slab look. It can be used in both interior and exterior locations.
The SpreadStone kit retails for $125 and comes in 11 popular colors, while LuxROCK is available in 5 colors.
Both kits are used to transform old laminate, wood, concrete or MDF surfaces into dazzling and functional works of art.
Tip for Fixing a Delaminating Cabinet

If you’ve ever had a cabinet start to delaminate, you know how frustrating it can be. The good news is that there is a simple and effective solution that doesn’t require a complete replacement. A cabinet maker may suggest using an iron to heat up the glue and rebind the delaminated area to the surface.
To use this technique, simply set the iron to medium heat and run it over the delaminated area. The heat from the iron will soften the glue, allowing it to bind back to the surface. The process may take some time, and you may need to apply pressure to the area with a clamp or heavy object while the glue cools and sets.
This technique has been used successfully by many homeowners and cabinet makers alike, and it can save you the time and expense of replacing a damaged cabinet.
However, it’s important to be careful when using an iron on wood, as excessive heat can cause further damage. Make sure to test a small, inconspicuous area first, and use caution when applying heat to delicate or intricate areas.
Watch: How to Cover Plywood Edges with Wood Veneer
Enlarging an Attic Access with a Fold-Down Ladder
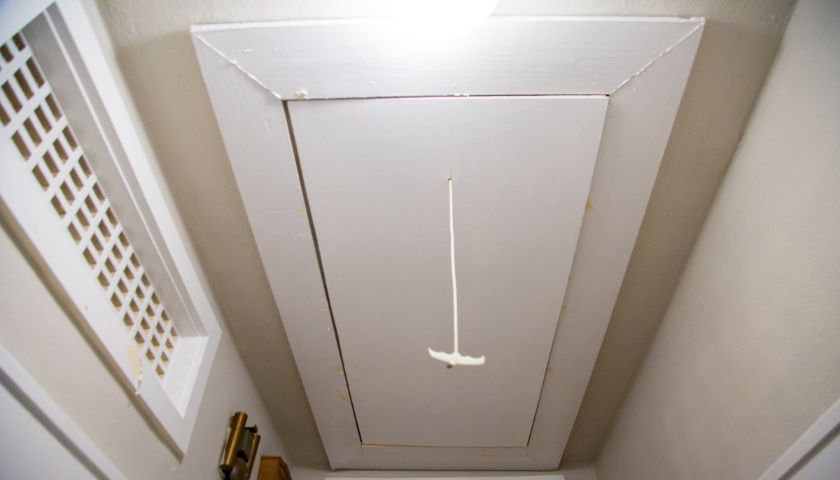
A homeowner wants to create some storage space in his attic, but the problem is the only access to the attic is a small hatchway in the hallway ceiling.
“How difficult is it to install one of those fold-down attic ladders?” he asks.
When installing a fold-down attic ladder, one of the key things you’ll want to keep in mind is basic framing. You don’t want to compromise your home’s structural integrity when cutting ceiling joists to enlarge the ladder opening.
If this sounds like a bit too much for you to handle, don’t be afraid to call in a professional contractor to handle the job for you.
Read: Everything You Need To Know About Attic Access Doors
Here are the basic steps to install a fold-down attic ladder:
- Choose the right ladder: Consider the size of the opening, the height of the ceiling, and the weight capacity of the ladder. I recommend going with an aluminum ladder if possible, as they tend to have a higher weight capacity than wood ladders. (Let’s face it, when you’re going up and down the ladder to store and retrieve items, you’re likely to be carrying something heavy.)
- Prepare the opening: Remove the old hatchway, and then use a saw to enlarge the opening. You may also need to reinforce the framing around the opening to ensure it can support the weight of the ladder and anyone who uses it.
- Install the ladder: Following the manufacturer’s instructions, install the ladder in the opening. This typically involves attaching the ladder to the frame, securing hinges and hardware, and adding any finishing touches, such as trim or insulation.
- Test the ladder: Make sure it is easy to open and close, and that it locks securely in place.
- Add safety features: To prevent accidents, install a handrail or a non-slip surface on the ladder treads.
Best New Products

The Masterbuilt Series 800 Digital Charcoal Griddle, Grill and Smoker
If your deck or patio is getting crowded with all your outdoor cooking toys, the new Masterbuilt Series 800 Digital Charcoal Griddle, Grill and Smoker may be just what you need to reduce the clutter and increase the fun of cooking outside.
This innovative outdoor cooking appliance combines the best features of a charcoal grill, griddle, and smoker into one unit.
One of the key features of this grill is its innovative charcoal system, which uses a gravity-fed hopper to automatically dispense charcoal into the firebox as needed. This not only ensures consistent heat and temperature control but also reduces the need for constant monitoring and refueling. The hopper has a 10-pound charcoal capacity, which can provide up to 10 hours of continuous cooking time.
The grill also features an 800-square-inch cooking surface split between a griddle and a grill grate. The griddle is ideal for cooking pancakes, eggs, and other breakfast foods, while the grill grate can handle everything from burgers to vegetables to fish. The cooking surfaces are made of durable cast iron, which retains heat well and provides excellent searing and caramelization.
The Masterbuilt Gravity Series 800 also boasts advanced digital controls, including a touchscreen display and a meat probe thermometer.
Listen to learn all about this Best New Product!
Find the Masterbuilt Series 800 Digital Charcoal Griddle, Grill and Smoker at The Home Depot.
This page contains affiliate links. If you purchase a product from these links, we will earn a small commission at no additional cost to you.
Simple Solutions

Soil Sifter — Here’s a quick, easy way to sift rocks, stones and clumps of grass from topsoil.
- Cut a piece of ¼-in. hardware cloth about 16 inches longer than the width of your wheelbarrow.
- Staple a 2×2 handle to opposite ends of the hardware cloth, then drape it over your wheelbarrow.
- Shovel the soil onto the hardware cloth, and the rocks will be filtered out and the clean soil will drop down into the wheelbarrow.
Watch: Soil Sifter

Air Compressor Tips — Here are four tips to keep in mind when using a portable electric air compressor:
- First, always wear safety goggles protection when running the compressor. And to reduce the noise level, place the compressor in an adjacent room, if possible.
- Compressors vibrate quite a bit when running, so set them on the floor and on top of a soft mat of some sort, such as a folded blanket or quilted moving pad.
- And all that vibration can over time loosen nuts, bolts and screws, so periodically check the compressor and tighten any loose fasteners.
- Compressed air often contains moisture that collects inside the compressor’s storage tank. It’s important to drain the tank after each use to prevent rust and corrosion. Unplug the compressor, then open the valve on the bottom of the tank. The air pressure in the tank will blow out the moisture.


