

Your water heater is the unsung hero of your home — it provides hot water to help with cleaning and washing and make your showers and baths more enjoyable. Unfortunately, since we rely so heavily on our water heaters, they go through a lot of wear and tear that can limit their life, reduce efficiency, and harm your hot water supply.
In this guide, we’ll explain why water heater maintenance is so crucial and provide five easy DIY tips for regular maintenance. We’ll also explain how to tell if you need professional water heater repair or total replacement.
Why Is Water Heater Maintenance Important?
We call on water heaters constantly to provide hot water to our fixtures and appliances, so they’re constantly under immense strain. As such, they need to be maintained properly to avoid excessive wear and tear and extend their useful life as much as possible.
If you don’t carry out proper water heater maintenance, you can quickly find yourself in hot water — or, rather, without hot water. If your water heater fails, you’ll no longer have sufficient hot water for cleaning and bathing, and you could be looking at repair or replacement costs totaling several thousand dollars.
Tips and Tricks for Maintaining Your Water Heater
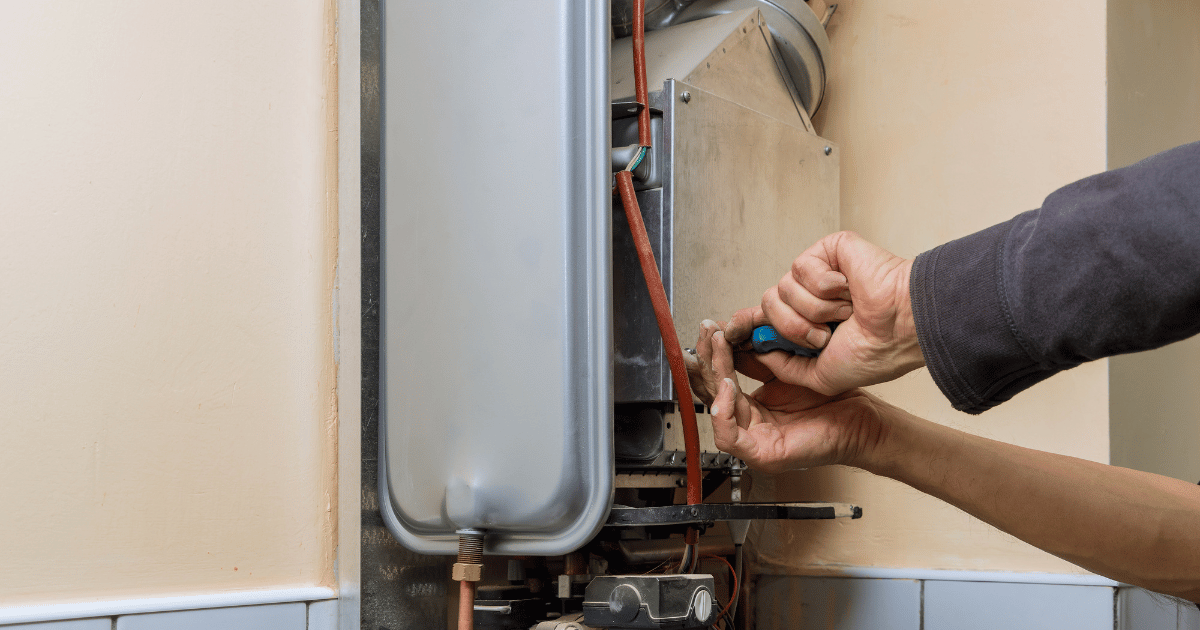
Thankfully, you don’t always have to turn to a professional plumber to maintain your water heater, as there are some things you can do yourself to keep it running and working efficiently. Below are five things you can do on a routine basis to avoid expensive repairs and replacements and maintain the hot water supply in your home:
- Flush your water heater.
- Test the temperature-pressure relief valve.
- Turn down the water temperature.
- Check your anode rod.
- Install insulation.
1. Flush Your Water Heater
Why do it: Remove sediment and improve efficiency
Tools needed: Small section of garden hose, 5-gallon bucket
Recurrence: 1 to 2 times per year
Ease: Easy
One of the best things you can do to keep your water running well is to flush it about once every six months. During normal operation, sediment will build up inside your hot water heater, including rust and minerals from your water.
An accumulation of these particles will eventually reduce the efficiency of your water heater, making it strain more to keep up with demand. Some particles in your water heater — like hard water minerals — can also corrode the inside of your tank, rendering it useless.
You can do a partial flush or a total flush, the latter of which requires that you shut down your water heater to avoid damage. We recommend a total water heater flush, but make sure the power to the appliance is cut before you begin. That could involve shutting the gas supply for a gas water heater or the breaker for an electric water heater.
Lastly, remember that this does not apply to tankless water heaters.
You can follow the steps below to do a total flush of your water heater:
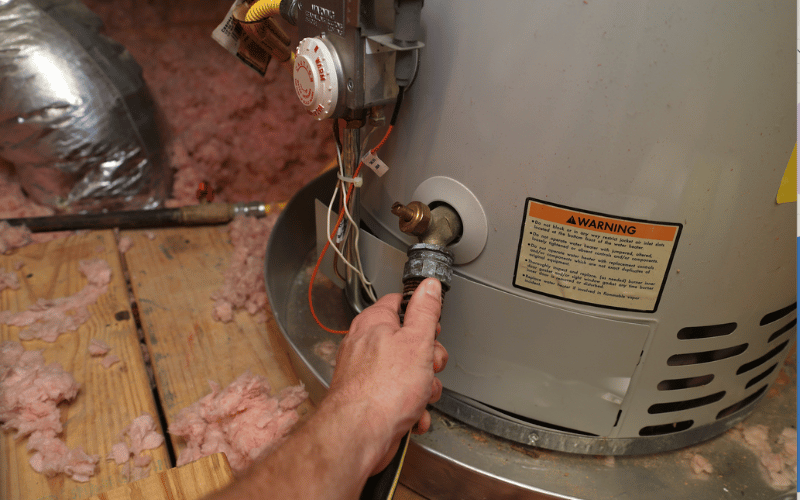
- Step 1: Shut off the power to your water heater. Skipping this step can lead to irrevocable damage and necessitate a total replacement. You should also shut off the cold water supply to the water heater. This can be done by closing the valve on the cold pipe running into the top of the tank.
- Step 2: Connect a short hose with an attachment to the nozzle located near the bottom of your water heater tank. Slowly open the valve to allow water to flow out into your 5-gallon bucket. When the bucket is close to full, shut the drain valve and empty the bucket. Repeat this process until no water comes out of your water heater.
- Step 3: Shut the drain valve and temporarily open the cold water supply. This should collect any sediment remaining behind. After about 30 seconds, close the cold water supply, open the drain valve, and repeat the process to drain the tank fully.
- Step 4: Finally, make sure the drain valve is fully closed, then open the cold water supply valve. Wait about 10 minutes for the tank to fill completely, then restore power to your water heater.
2. Test the Temperature-Pressure Relief Valve

Why do it: Avoid dangerously high water pressure in your tank
Tools needed: 5-gallon bucket
Recurrence: 1 to 2 times per year
Ease: Very easy
The temperature-pressure relief valve — often called the pressure release valve, the TPR valve, or the T&P valve — is designed to release water from your water heater if the pressure inside the tank ever gets too high. Under normal operation, the TPR valve should never be activated, but it can help prevent serious damage to the inside of your tank if the pressure rises. Ultimately, it helps avoid total water heater replacement and water damage in your home.
TPR valves can malfunction, causing them to fail in high pressure or even leak when the pressure isn’t too high. Testing to make sure this valve is functioning properly is a good way to avoid costly repairs and property damage if there is a pressure issue.
You can follow the steps below to test this valve on your water heater:
- Step 1: Locate the TPR valve on your water heater. It usually has a toggle and an open piece of pipe extending down from it toward the floor.
- Step 2: Place your 5-gallon bucket under the pressure release valve discharge pipe.
- Step 3: The water that will come out of the valve when opened will likely be scalding and close to 140 degrees, so we recommend wrapping your hand in a rag and being careful not to let the water contact your skin. When you’re ready, pull the toggle to open the release valve. Water should flow into your bucket.
- Step 4: Let the water run for a few seconds, then release it to close it again. If you can’t open the valve or notice water continuing to drip from it after releasing it, you’ll need to have the valve replaced by a plumber.
3. Turn Down the Water Temperature

Why do it: Reduce strain on your water heater
Tools needed: Screwdriver
Recurrence: One-time only
Ease: Very easy
Your water heater has two thermostats, usually taking temperatures at the top of the tank and the bottom, closer to the heating elements. One thermostat — usually the bottom one — controls the maximum temperature your water can reach, and the other — usually the top one — controls the minimum temperature the water inside can reach. These are usually set five to ten degrees apart to maintain a suitable temperature and improve energy efficiency.
By reducing your water heater temperature, you’re easing the strain on the appliance and prolonging its lifespan. Most homeowners prefer a temperature setting of 140 degrees Fahrenheit, but turning yours down to 120 to 130 degrees can reduce energy consumption and wear and tear on the water heater.
Be mindful of where your water comes from before changing the temperature. You shouldn’t have any issues if you’re connected to public water. However, if you get your water from a well, bacteria in the water might thrive in those lower settings but be killed off at the higher 140-degree temperatures. If you drop your temperature and notice a sulfur smell from your hot water, we recommend bumping the temperature back up.
We’ll include instructions for this simple maintenance tip below:
- Step 1: Locate the thermostats on the exterior of your water heater. These can sometimes be hidden behind a small bump out that can be unscrewed. You might need to move some insulation out of the way to get to the actual thermostats.
- Step 2: Using a screwdriver, turn the adjustment screws to your desired settings.
- Step 3: Replace any insulation and reattach any thermostat covers you removed, if applicable.
4. Check Your Anode Rod

Why do it: Avoid dangerous corrosion of your water heater tank
Tools needed: Socket wrench and 1/16” socket, 5-gallon bucket, new anode rod (if applicable)
Recurrence: 1x per year
Ease: Very easy
The inside lining of your water heater will naturally corrode from minerals, such as calcium and magnesium, in your water. A sacrificial anode rod hangs inside the tank to prevent this from happening. The anode rod is made from metals that corrode more easily than the steel making up the water heater tank, so it corrodes before the tank does. If the anode rod corrodes entirely, the tank will begin to corrode — eventually destroying your water heater.
Sometimes, the anode rod attachment will be obvious and located right on top of your tank. In other cases, you might have to unscrew any caps on your water heater and move insulation underneath to locate the anode rod.
Once you know where the anode rod is, you can follow the steps below to check the level of corrosion:
- Step 1: Shut the cold water supply valve to your tank and shut off the fuel source, whether that’s gas or electric.
- Step 2: Place your bucket under the drain valve and let five to ten gallons of water out, dumping it down a nearby drain.
- Step 3: Using your socket wrench, back out the anode rod and pull it out of the tank entirely.
- Step 4: Inspect the anode rod for corrosion. You’ll need to buy a new one if it looks heavily damaged. If not, simply screw it back in.
- Step 5: Once your anode rod is back in place, replace any insulation and covers, open the cold water supply valve, and turn the fuel source back on.
5. Install Insulation

Why do it: Improve efficiency and reduce wear and tear
Tools needed: Water heater insulation jacket, pipe insulation, utility knife
Recurrence: One-time only
Ease: Very easy
Your water heater comes heavily insulated, but adding insulation to the outside and the hot water pipes leaving the appliance will further reduce energy loss to the surrounding area. You can insulate just the water heater or just the pipes, but we recommend doing both for maximum efficiency. These can both be picked up at a home improvement store or on Amazon.
Ultimately, boosting your water heater’s efficiency will reduce strain to keep up with demand and extend its life.
You can follow the steps below to get this DIY job done quickly:
- Step 1: Roughly measure the circumference of your water heater using a piece of string. You can use this measurement to cut your water heater blanket to the right size with your utility knife.
- Step 2: Wrap the blanket around the water heater, making sure to leave the drain valve and the TPR valve exposed. You can cut around them if necessary. You can use duct tape to secure the blanket, but tape should be provided.
- Step 3: Measure the hot water pipes extending from your water heater and cut lengths of pipe insulation to fit. Wrap each length of pipe insulation around the pipes until they enter your wall.
What Are the Signs Your Water Heater Needs To Be Repaired or Replaced?
Generally, water heaters last between eight and 12 years. Even when you use the routine maintenance tips above, your water heater will eventually need to be repaired or replaced. Knowing when each is appropriate will help you save money on unnecessary replacements and unhelpful repairs that won’t fix your issue.
Some signs that your water heater needs to be repaired include insufficient hot water being delivered to your home, minor leaks around connections only, clinking noises coming from the inside of your water heater tank during operation, and issues with your pilot light continuously going out.
Some signs that your water heater needs to be replaced include more severe leaks coming from the tank itself (not the connections), finding your anode rod completely destroyed or corroded, or finding that it takes a long time for water to get hot once you turn on a faucet or fixture.
If you experience any of these issues, we recommend bringing in a certified plumber for a permanent fix. You can use the tool below to connect to reliable plumbers in your area specializing in water heater repair and replacement.
FAQs about Water Heater Maintenance
How often should you flush a water heater?
We recommend flushing your water heater one to two times per year. If you live in an area with hard water with minerals that expedite corrosion and settle more readily in your tank, we recommend flushing your water heater twice a year. If you live in an area with soft water, once per year should be plenty.
What happens if you don't flush your water heater?
The longer your water heater goes without flushing, the more sediment will accrue in the bottom of the tank. Sediment build-up decreases efficiency, leaving you with a smaller supply of hot water and a shortened water heater lifespan.
How to flush sediment out of a water heater?
First, shut off the cold water supply and the fuel source. Next, open the drain valve and let the water drain into a bucket for disposal. Continue until no water comes out. Turn on the cold water supply for a few seconds to wash the bottom of the tank clean, and let it drain. Finally, close the drain valve, open the water supply, and turn your fuel source back on.


