


Your kitchen is the room with the most hard-to-pack, often fragile items. It’s also one of the most frequently used rooms in your home.
For these reasons, you may find your pre-move self asking:
- Which items should I pack first? Last?
- What packing material could keep these plates from breaking?
- Should I wait until the last minute to pack my kitchen?
Luckily, we’ve got answers to these questions and more in this guide to moving your kitchen. These packing tips will save you the trouble of hiring professional packers or breaking your precious heirloom dishes. We’ll also provide decluttering hacks, a material guide, and other packing pro tips to make your kitchen move a breeze.
How To Pack Your Kitchen Items for Moving
Organize and Declutter
Organization should be the first step of any move. Start the process by decluttering your kitchen. Before packing kitchenware, go through your inventory and start a donation box. Determine what you’d like to donate to a charity or secondhand store based on the frequency of use. There are many charities offering donation pick-up services, so you might want to reach out to them.
We know getting rid of your belongings is sometimes tricky – especially if you like to collect coffee mugs or beer steins. However, decluttering makes unpacking much more manageable. Our rule of thumb is that if you won’t notice the item is gone in a week, it doesn’t serve you anymore.
Once you’ve purged your kitchen of worn-out and unused items, take some time to tidy up your remaining stock. Your kitchen is likely organized by drawers and shelves, so this step should be easy.
Simplify the packing process by creating an inventory list of the items you find. Then, pack items by functional group and frequency of use. Don’t forget to label boxes as you seal them shut. Labels will save you time and frustration while loading a moving truck and organizing your new home. Plus, you can add important labels like FRAGILE or THIS SIDE UP to prevent careless loading.
be sure to use quality packing materials, this is because using the best quality packing supplies ensures the safety, protection, and organization of your belongings during the moving process. It offers peace of mind, reduces the risk of damage, and can ultimately save you time, money, and stress.

Prepare Your Packing Supplies
Determine your packing supplies list based on the inventory you prepared in step one. Knowing your moving load will help you determine the types and quantities of packing materials you need.
Packing supplies for a successful kitchen move include:
- Moving boxes
- Large boxes for appliances, cookbooks, and dry food items
- Medium-sized boxes for dishes, cups, and pans
- Small boxes for silverware, spice containers, and loose items
- Heavy-duty boxes for ultra-fragile or expensive items
- Bubble wrap to protect fragile items from clinking together and breaking
- Plastic wrap to separate glass containers and keep them from shifting within boxes
- Newspaper to prevent pots and pans from scraping together and shifting
- Packing tape to securely seal cardboard boxes
- Plastic Ziploc bags to carry loose items
- Box dividers to effectively transport glassware and dish sets
- Box labels to thoroughly organize groups of items and simplify the unpacking process
Food Items
Avoid buying lots of groceries in the weeks leading up to your move. Instead, get creative and use what you have on hand. Dethaw those burgers you’ve had for a while and make a meal of them. When moving day arrives, you’ll be glad to have a smaller stock of perishable food. You’ll have fewer items to transport and won’t risk wasting expensive groceries.
Use a small box to move your spice cabinet, condiments, and other small pantry items. Then, load dry food boxes and cans into a large moving container. You should keep food items together – if possible – but avoid loading a box too full. Even the sturdiest boxes can break if too many items are inside, sending all of your soup cans, pasta boxes, and saltines crashing to the ground.
We suggest preparing an essentials box of the items you’ll need immediately in your new home. Note which food items you use daily and set those aside for the box. You’ll also pack other items like silverware and a few dishes into this box.
Lastly, note that some long-distance moving companies don’t transport food items. So if you’re hiring pro movers, you’ll need to use as many of your dry items as possible beforehand. Consider donating unopened food products to a food bank if you don’t use them before moving.
Pots and Pans
Pots and pans are less fragile than other kitchenware items, but they still need protection from scrapes, dents, and handle breakage.
You can save space by nesting pots and pans that fit together without force. While nesting your cookware items, insert a dish towel or piece of packing foam between each piece. Remove glass lids from any pots and stack these as you would glass plates, with bubble wrap or foam around each piece.
Once you’ve carefully packed the pots and pans, fill in the empty box space with leftover packing materials. Fill gaps around items with bubble wrap or crumpled newspaper to increase the shock absorption of the box.
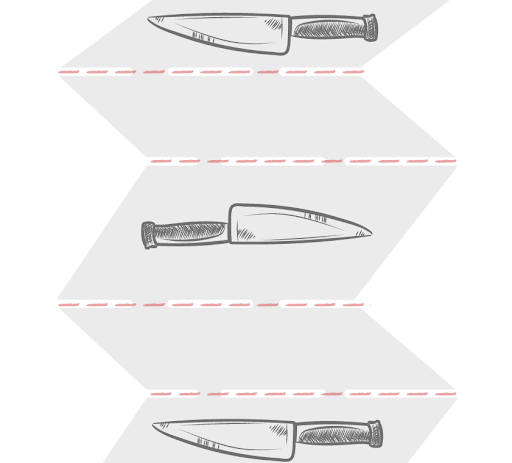
Silverware and Knives
Packing silverware is easy, especially if you already have the utensils in a tray organizer. Remove each group of utensils from their designated section of the tray. Go through each type of utensil, stacking the pieces together neatly and wrapping the stacks in plastic. Then, secure the wrapped bundle with a rubber band and place it back in its designated tray section. Place the bundles in a sealable plastic bag if you don’t have a cutlery tray.
Pack knives extra cautiously to prevent sliced boxes, damaged blades, and unexpected injuries. Fold a large sheet of packing foam over a knife. Lay another knife facing in the opposite direction over the fold. Repeat this until each of your knives is between a fold of packing foam. Then, secure the bundle with rubber bands or packing tape. Wrap the whole bundle in a layer of bubble wrap with a label for knives.
Dishes
Dishes are usually flat and stackable, making them easy to transport. However, avoid packing them without protection; these items are still breakable, and one accidental drop could cost you an entire set of plates. Dishes are heavy, and a large, overfilled box is more prone to falling apart under the weight. For this reason, avoid packing these items into huge moving boxes. We suggest packing dishes in a medium-sized container reinforced with heavy-duty packing tape.
Start by lining the bottom of the box with bubble wrap to prevent the items from sliding and jolting. Always place a layer of packing paper or plastic wrap between flatware items. This keeps the items from sliding around in the box and provides shock absorption in the event of a drop. If you run out of packing paper, save money by dividing your flatware with dish towels.

If you’re concerned about the safety of your flatware collectibles or antique pieces, consider purchasing a dish packing kit like this one from Amazon. These kits include cardboard dividers, foam sleeves, and reinforced siding to protect your fragile kitchenware.
Glassware
Glassware pieces are likely some of the most fragile items in your kitchen. You can prevent damage to your stemware, cups, and dishes by adequately packing them with the appropriate packaging materials.
Packaging wine glasses and glass cups vertically, uniformly, and all in one box is the best way to keep them safe. Buy a heavy-duty moving box with dividers. Alternatively, create DIY dividers with empty shoeboxes or food containers.
Wrap your stemware pieces with special care. Remove the box dividers and line their outer sides with bubble wrap or packing foam. Wrap each glass with at least two layers of packing paper. Reinsert the divider and fill the glasses into the cells. If you have a tall box, stack a second row of stemware atop the first to double your space. Just remember to divide and thoroughly pad the second layer of glasses.

Small Kitchen Appliances
Kitchen appliances aren’t just refrigerators and dishwashers – you also likely have several smaller gadgets that streamline food preparation. Devices like mixers, toasters, blenders, and coffee makers are part of your kitchen move.
The best way to transport small appliances is to return them to their original boxes, which are already sized perfectly for the items. If you can’t find the original packaging for an appliance, find something similar. Wrap the appliance in a dish towel or packing paper. Then, stuff some packing material around the item before shutting the box.
We suggest choosing a midsize box if you’d prefer to pack more than one appliance into a container. A small box will discourage you from packing it too full and straining your back. If you have cookbooks to move, slide them in between the appliances as makeshift dividers.
Final Thoughts
We hope these tips help you pack your kitchen for a quick, efficient move. With intentional nesting and careful padding, you’ll arrive at your new home with all items intact. A rule of thumb for moving any kitchen item is to wrap it in cushioning material and fill the empty space in moving boxes. This best practice will save you a lot of frustration and heartbreak when unpacking.
If you’re using commercial truck services, remember that organization and preparation are also crucial to a successful move. Prepare an essentials box for the week leading to moving day. Then, keep similar items together by labeling boxes as you go. You’ll have a smoother unloading process that gets you closer to enjoying your new kitchen.


