


Whether you’re interested in laying a brick path from your driveway to your front door, a ground-level patio, or simply creating a safe and beautiful space for an above-ground fire pit or grill, bricks are an affordable, durable, and timeless choice.
Before you call a mason or decide to do the work yourself, you’ll need a basic grasp of brick patterns. If laying bricks yourself, determine if your space has curves and whether you prefer a pattern requiring cuts, as both require expertise. Consider hiring help if unsure about advanced tasks.
Here are six common brick patterns, from the easiest to the most difficult.
1. Running Bond
Also called subway tile, the running bond consists of rows of staggered bricks laid end-to-end. This pattern can easily accommodate light curves, making running bonds excellent for pathways and patios.
As very minimal cutting is needed, just straight edges, running bonds suit novice bricklayers. Rotating the pattern 45 degrees creates visual interest through a diagonal orientation while maintaining simplicity.

When laying running bonds, use spacers for consistency between bricks, ensuring a uniform look.
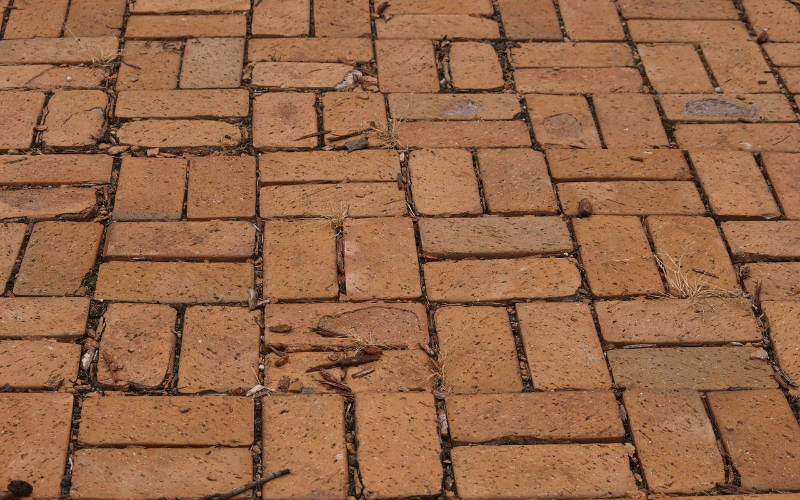
2. Stack Bond
A stack bond design resembles the running bond with one difference: rows are laid parallel rather than staggered.
While precisely aligning rows takes time, you don’t have to do any cutting, suiting stack bonds to curves. The pattern’s orderly appearance comes from proper brick spacing, making it ideal for small patio and garden path projects.
3. Basket Weave
With alternately laid brick pairs, the basket weave produces a textured checkerboard pattern that accommodates slight curves without cuts. Slightly more complex visually than running bonds, basket weaves are comparably easy for horizontal surfaces like patio sections.
Precision is vital, so properly space bricks along chalk lines to achieve checkerboard sharpness. The basket weave adds style to small patios.
4. Diagonal Basket Weave
Simply put, this pattern angles the basket weave 45 degrees, forming diamonds rather than squares. Visually richer without greater complexity, diagonal basket weaves accommodate curves if mortar is allowed between pavers.
The precise 45-degree cuts required may warrant hiring specialists with appropriate tools. Planning lines via dry laying will help maintain pattern consistency for aesthetically pleasing results along driveways, walkways, and borders.
5. Herringbone
Alternating bricks at 45- and 90-degree angles produces a zigzag resembling fish bones, which pavements during the Roman Empire featured. Minimal edge cutting eases laying herringbone patterns, though time-consuming for novices.
You need to space chalk lines properly to prevent errant zigzags. Dry runs for further accuracy. The striking yet uniform appearance suits driveways, patios, or garden walkways.

6. Spanish Bond
Four or more bricks arranged around a half-brick space distinguish this visually compelling yet advanced pattern. Each cycle requires cutting a brick, prompting many beginners to purchase pre-cut kits so they can maintain the layout as it repeats. Better suited to straight path designs, Spanish bond patterns accommodate minimal curves and right angles. Achieving precision may warrant hiring masons to guarantee quality results that enhance patios and walkways aesthetically for years.
Helpful Tools and Materials for Laying Brick Patterns
If you are going to design and build a brick pattern as a DIY project, you will need several tools and materials to make the project go smoothly and finish with precision. Here are tools and materials to consider:
- Broom
- Edging
- Gravel
- Hammer
- Hose
- Rake
- Sand
- Shovel
- Spade
- Spikes
- Stakes
- Tamper
- Tape measure
So, Which Brick Pattern Suits Your Project?
The ideal layout depends entirely on your needs and space specifics. Small, curved zones often take advantage of basket weave and running bond simplicity. More expansive driveways warrant consideration of visually captivating herringbone and Spanish bond arrays requiring advanced expertise.
Beginners should opt for basic running or stack bonding. After careful planning, veterans can try intricate herringbone or basket-weave designs for enhanced aesthetic outcomes. Regardless, use lines, spacers, and dry runs to actualize accuracy.
Seeking intricate patterns, demanding specialty cutting? Consult seasoned professionals to actualize quality, upgrading outdoor living areas for years through proper brickwork. Weigh your skills against each pattern’s complexity before finalizing plans.
FAQs About Brick Patterns
What are the easiest bricks to lay?
Running and stack bond top simplicity for beginners with their straight rows, curving ability, and minimal cutting needs compared to advanced alternatives.
What tools should I have for laying bricks?
Must-haves encompass shovels, levels, hammers, brooms, tape measures, spades, spacers, stakes, hoses, and potentially tampers, plus mixing gear and wheelbarrows.
What is the most popular brick pattern?
The versatile running bond stands supreme in popularity for its simplicity, suiting walkways, patios, and more. Visually captivating herringbone arrangements also have devotees.
How much does a brick patio cost?
A basic 100-square-foot patio costs about $1,100 to $1,700 in labor and $1,500 to $3,500 altogether, if including bricks along with base, mortar, and miscellaneous materials. Pricing rises accordingly with your project’s complexity, specialty components, and scale.


